Enhancing Your Arduino Projects with Proportional NeoPixel Lighting
Introduction
In the world of Arduino-based DIY projects, lighting plays a crucial role in creating dynamic and eye-catching displays. NeoPixels, individually addressable RGB LEDs, provide a versatile and colorful solution for your projects. In this blog post, we’ll explore how to use NeoPixels with an Arduino Uno and discuss the benefits of this specific solution over using individual single-color LEDs. We’ll also delve into potential use cases for this unique NeoPixel implementation.
Proportional NeoPixel Lighting: A Unique Approach
The featured project in this blog post introduces a distinctive approach to NeoPixel lighting. Instead of the conventional static color or pattern display, this solution offers proportional NeoPixel lighting. In this mode, each NeoPixel on the strip responds independently and proportionally to an analog input, creating a visually appealing and customizable lighting effect.
Benefits of Proportional NeoPixel Lighting
1. Dynamic Visual Feedback
Unlike static single-color LEDs, proportional NeoPixel lighting responds dynamically to changes in analog input. Whether you’re monitoring environmental data, sensor readings, or user interactions, the visual feedback is immediate and engaging.
2. Customizable Color Gradients
The unique feature of this solution is the ability to create color gradients. As the analog input value changes, NeoPixels transition smoothly from one color to another, allowing you to represent data or create captivating visual effects.
3. Versatile Arduino Integration
The provided Arduino sketch simplifies the integration of NeoPixels into your projects. It offers three distinct modes: single-color mode, proportional color mode (each NeoPixel displays a different color based on analog input), and common proportional color mode (all NeoPixels display the same color based on analog input).
Using Proportional NeoPixel Lighting with Arduino
Hardware Setup
To use this solution with an Arduino, you’ll need:
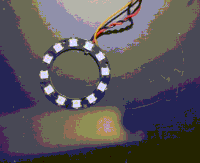
- An Arduino Uno
- NeoPixel LEDs (quantity depends on your project)
- Power supply (if required)
- Jumper wires
Code Implementation
The provided Arduino sketch showcases the implementation of proportional NeoPixel lighting. It’s well-documented and offers flexibility for customization based on your specific project requirements.
- Single-Color Mode (Mode 0): In this mode, all NeoPixels display the same fixed color, which can be customized. It’s ideal for situations where you want a uniform and static color display. For example, you can use this mode to create a decorative lighting effect with a consistent color.
- Proportional Color Mode (Mode 1): In this mode, each NeoPixel responds individually and proportionally to the analog input voltage. As the analog input value changes, NeoPixels transition from one color to another, creating a dynamic color gradient. This mode is excellent for visualizing data or creating eye-catching effects that react to changing conditions.
- Common Proportional Color Mode (Mode 2): Mode 2 is similar to Mode 1, but with a twist. Instead of each NeoPixel displaying a different color based on analog input, all NeoPixels display the same color proportionally. This mode is useful when you want all NeoPixels to reflect the same data or environmental condition with a consistent color.
Each mode offers unique visual effects and functionality, making it versatile for various project requirements and creative applications. The ability to switch between these modes allows you to adapt the NeoPixel lighting to suit different scenarios and purposes.
 Mode 0 | 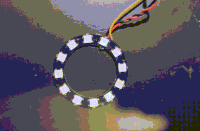 Mode 1 | 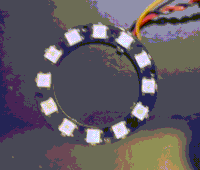 Mode 2 |
The code below and the wiring diagram might need (free) Patreon access to view.
Potential Use Cases
1. Data Visualization
Use proportional NeoPixel lighting to visualize data in a captivating way. Whether you’re displaying temperature trends, stock market data, or social media metrics, the color gradients provide an intuitive representation of changing values.
2. Interactive Art Installations
Incorporate this unique lighting solution into interactive art installations. Allow users to influence the lighting patterns through physical interactions, creating immersive and engaging experiences.
3. Mood Lighting
Enhance your living space with mood lighting that adapts to your environment. The color transitions can mimic the time of day, respond to music beats, or create calming ambiance.
Conclusion
Proportional NeoPixel lighting with Arduino opens up a world of creative possibilities for your DIY projects. Its dynamic responsiveness, customizable color gradients, and versatile integration make it a valuable addition to your maker’s toolkit. The provided Arduino code offers a starting point to explore this unique NeoPixel solution, empowering you to bring your ideas to life with captivating lighting effects.
So, take the leap and elevate your Arduino projects with proportional NeoPixel lighting, where your imagination is the only limit!